New Toys!
Considering I never really got into electronics when I was working in the field straight after leaving school, the release of the Arduino and Raspberry Pi boards have piqued my interest and I have been curious to see what I can do with them.

Okay, it's nothing special, and there are probably slicker ways to write the code, but this is as much about getting familiar with the environment and the electronics as anything.
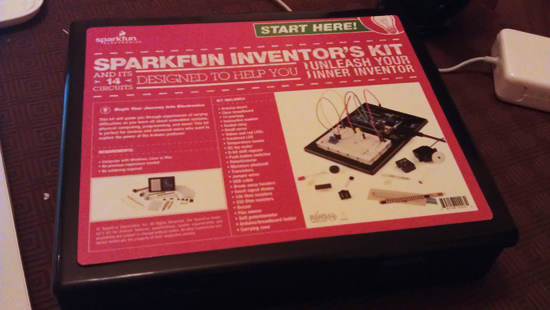
Thanks to my cousin and his wife buying me the Arduino Uno, my going to Uni to do a course on AI and Robotics, and now working in an electronics environment again, I was able to give my folks a somewhat late birthday present list consisting solely of electronics stuff. Top of the list was this very handy little inventors kit from SparkFun:
Opening it tonight, I made a start on working through Sparkfun's inventor guide, getting to know the basics. The first couple of exercises are about controlling LEDs, flashing a single LED and operating a sequence of them. Of course, put a sequence of LEDs together and my first thought is to create something along the lines of the Cyclon's from the original Battlestar Galactica ... younger bods are perhaps more likely to think of KITT :-)
With this in mind, I tweaked Sparkfun's CIRC-02 to achieve the following:
For more information on the original build, check out the video; there is also a breadboard layout sheet available for download.
Anyone who has gone through all this already and has experience with Arduino and setting up circuits has probably disappeared off already, so what follows should hopefully help those of you as new to this as I am.
Assuming you have set up the circuit according to the instructions available at the links above, then a minor adjustment is needed to the circuit. From what I can see, of the pins set up for output, only pins 3, 5, 6, 9, 10 and 11 can be used for analog output, so you need to select the six LEDs to be set up and connect them accordingly. Once this has been done, then the program can be written, the entirety of which I have included here:
// LED pin variablesint ledPins[] = {3, 5, 6, 9, 10, 11}; // Defines the analogue pinsint ledLvl[] = {0, 0, 0, 0, 0, 0}; // Sets the starting LED power levelint delayTime = 150; // Set the default delay time
/* setup() * Sets up the pins defined in the array for output and * defaults the level to 0 - should do this anyway, but * it is always good to define. */void setup(){ for (int i = 0 ; i < 6 ; i++) { pinMode(ledPins[i], OUTPUT); analogWrite(ledPins[i], ledLvl[i]); }}
/* loop() * The function that gets called repeatedly, so for each call to * the function we call the cylonFade() function. */void loop(){ cylonFade();}
/* cylonFade() * Uses 6 yellow LEDs in pins 3, 5, 6, 9, 10, 11, cycling first * in one direction, then the other. */void cylonFade(){ for (int i = 0 ; i < 6 ; i++) { analogWrite(ledPins[i], 255); ledLvl[i] = 255; dimOldLEDs(ledPins[i]); delay(delayTime); } for (int i = 6 ; i >= 0 ; i--) { analogWrite(ledPins[i], 255); ledLvl[i] = 255; dimOldLEDs(ledPins[i]); delay(delayTime); }}
/* dimOldLEDs(int) * Loops through the LEDs, reducing the power level for those LEDs * not matching the current LED pin. */void dimOldLEDs(int currPin){ for (int j = 0 ; j < 6 ; j++) { if (ledPins[j] != currPin) { ledLvl[j] /= 5; analogWrite(ledPins[j], ledLvl[j]); } }}
Okay, it's nothing special, and there are probably slicker ways to write the code, but this is as much about getting familiar with the environment and the electronics as anything.

Comments